 Pin It
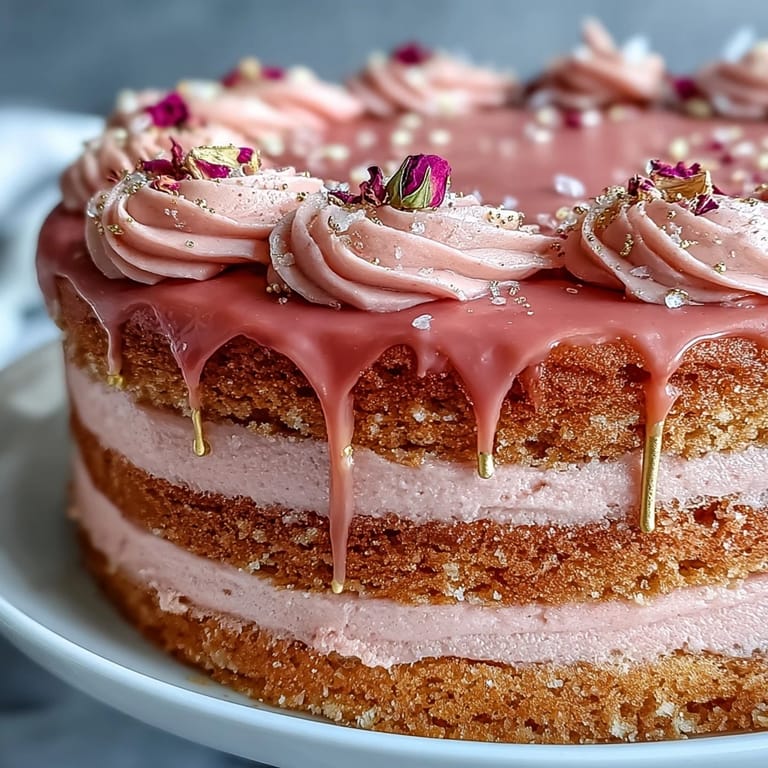
 The day I first decided to bake a rosé velvet cake, I was midway through planning my friend's bridal shower and desperately searching for something that would feel as joyful as our shared laughter. The kitchen glowed with late afternoon light, and a bit of spilled flour found its way between the cookbooks and a glass of leftover wine—my inspiration. There was a lilting aroma of vanilla and wine in the air as I whisked the batter, and for a moment, even the gentle hum of my mixer felt celebratory. Experimenting with the gold drip felt almost rebellious until I saw how it shimmered in the light. This cake has since become my go-to for any occasion that calls for a little sparkle and a lot of heart.
I once made this cake on a drizzly spring morning for my sister and her bridesmaids—the kitchen swirled with chatter and pink-tinted buttercream, and even the rain seemed to pause at the window for a peek. There was frosting in our hair and more than one giggle over who got to lick the spoon, but the real magic was the silence after the first forkful—a stillness filled only by smiles.
Ingredients
- All-purpose flour: Sifting the flour ensures the light, even crumb you want for a showpiece cake like this—don’t skip it for best results.
- Granulated sugar: I like using extra-fine sugar if I have it on hand for a smoother batter, but regular works beautifully.
- Baking soda: Essential for giving the cake its lift—double-check yours is fresh so those layers don’t end up dense.
- Fine salt: Just a dash sharpens the sweet flavors and underlines the rosé notes.
- Unsweetened cocoa powder: Use natural rather than Dutch-processed for its subtle warmth and signature ‘velvet’ hue.
- Vegetable oil: I’ve learned that oil provides essential moisture, keeping your cake tender for days—worth the switch from butter here.
- Eggs: Bring them to room temp so your batter stays silky and well-emulsified.
- Buttermilk: The slight tang balances the sweetness of the cake and highlights the rosé flavor—don’t substitute regular milk if you can avoid it.
- Rosé wine: Choose something dry or sparkling; the fragrance makes the cake irresistible and it’s a sure conversation starter.
- Vanilla extract: Always pick pure vanilla for depth—it ties the floral and creamy notes together.
- White vinegar: Just a splash; it reacts with the baking soda and buttermilk for a classic velvet crumb.
- Pink or rose gel food coloring: Go light-handed and build to your desired blush—a few drops make all the difference.
- Unsalted butter: For buttercream, soft and at room temp means it whips up extra fluffy.
- Powdered sugar: Sift before using to avoid stubborn sugar lumps in your frosting.
- Edible gold luster dust: Splurge on a quality, edible brand—there’s nothing like that glinting finish for a celebration.
- White chocolate chips: Melt gently so your gold drip is smooth and glossy.
- Heavy cream: Blends with the chocolate for a pourable texture that flows beautifully over cake edges.
- Vodka or clear lemon extract: These let the luster dust paint on smoothly—don’t worry, the alcohol evaporates quickly.
Tired of Takeout? 🥡
Get 10 meals you can make faster than delivery arrives. Seriously.
One email. No spam. Unsubscribe anytime.
Instructions
- Prep the Pans:
- Set the mood with your favorite playlist and line three cake pans with parchment—this extra step makes unmolding a breeze.
- Whisk the Dry Ingredients:
- Sifting flour, sugar, cocoa, soda, and salt fills the air with a faint chocolatey aroma; you’ll see how airy your dry mixture becomes.
- Mix the Wet Ingredients:
- In a separate bowl, blend the oil, eggs, buttermilk, rosé, vanilla, and vinegar; the mixture should look creamy and slightly pink from the rosé alone.
- Combine and Color:
- Pour the liquid into your dry bowl and fold until smooth; swirl in gel food coloring until you love the rosy shade peering back at you.
- Bake the Layers:
- Divide batter evenly, smoothing tops; as they bake, your kitchen will smell like a spring garden with sweet undertones.
- Cool Completely:
- Let the cakes rest in pans before turning out onto a rack; patience now means flawless layers later.
- Whip the Buttercream:
- Beat butter until pale and fluffy, then slowly add powdered sugar; a cloud of sweetness rises and the mixer hums contentedly.
- Add Rosé and Finish:
- Splash in rosé and a pinch of salt, whip until airy; taste for balance and adjust if you crave more floral brightness.
- Layer and Crumb Coat:
- Level cakes, then layer with buttercream—don’t fret over crumbs, the first coat catches them before chilling.
- Final Frosting:
- After a quick chill, smooth on the final coat; it’s your moment to create silky, swooping swirls.
- Gold Drip:
- Melt white chocolate and cream, cool briefly, then drip along the cake’s edge—it’s mesmerizing to watch golden streaks slowly drip down.
- Paint On the Gold:
- Mix luster dust with vodka or extract, then gently paint each drip once set; trust your instincts, every brushstroke adds a bit of magic.
- Decorate and Serve:
- Finish with edible gold flakes, rose petals, or fresh berries if you’re feeling extra, then step back and admire before slicing.
 Pin It
 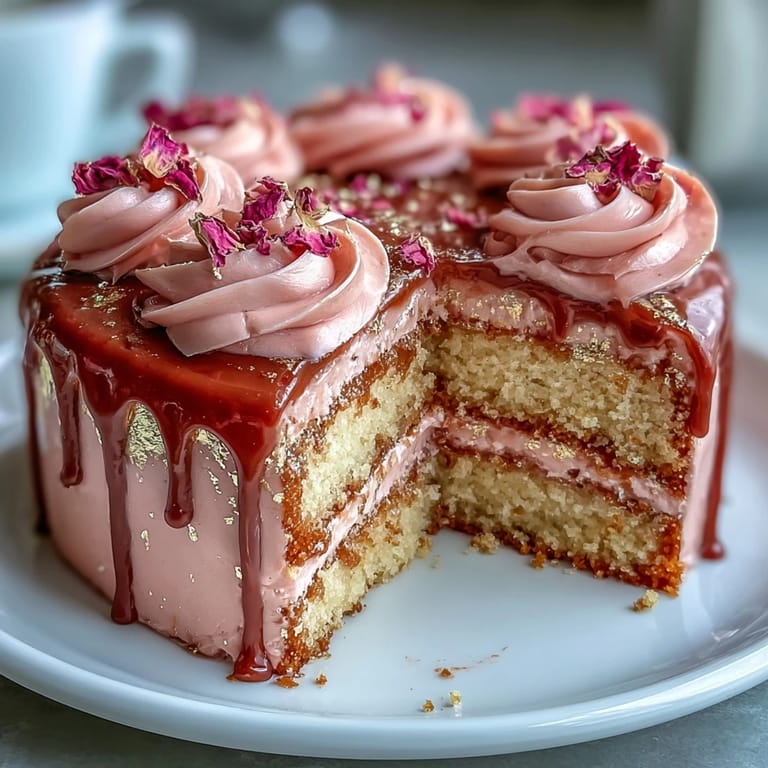 Pin It
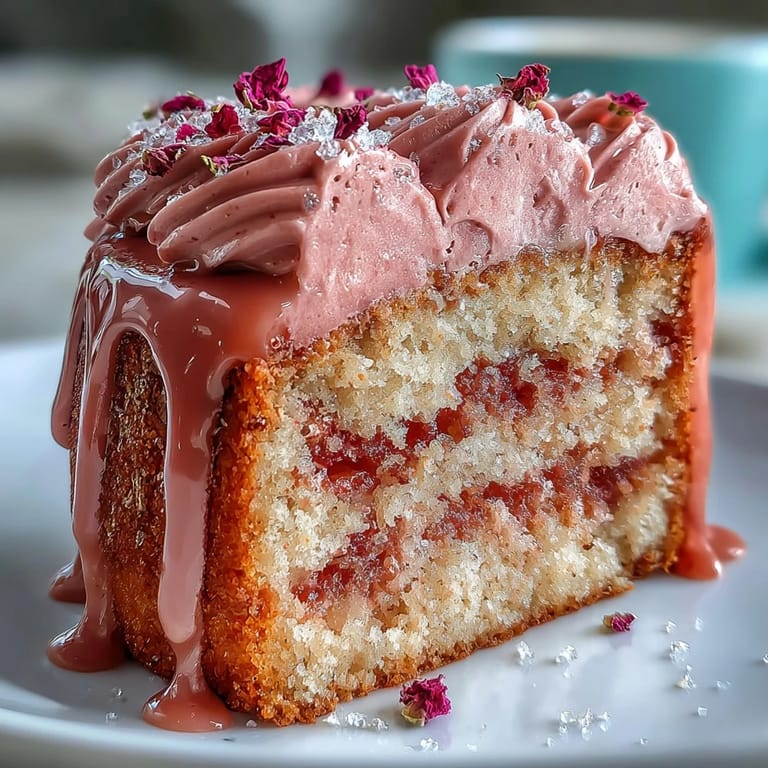
 Watching the gold drip set on the cake during my friend’s bridal shower, a hush fell over the room—suddenly, everyone was gathered around the kitchen island snapping photos and marveling, as if we’d conjured up something celestial together.
Getting That Dreamy Pink Tone
I learned after a few attempts that gel food coloring is your best friend for this cake—start with barely a dab and blend well before adding more. The batter deepens as it bakes, so less is often more for that soft rosé blush.
Gold Drip Without the Stress
Don’t be intimidated by the gold drip—it doesn’t have to be perfect to look spectacular. The beauty is in letting the drips fall at their own pace, and if one runs long, chalk it up to artistic flourish.
Make-Ahead and Storage Notes
I’ve found this cake holds up beautifully if you need to make it a day early—just wrap it well and let it come close to room temperature before serving for maximum flavor and texture.
- Chill your mixing bowl to keep the buttercream fluffier on warm days.
- Assemble the cake on your serving platter for easy transfer later.
- Store leftover slices covered in the fridge for up to three days.
 Pin It
  Pin It
 Cake always tastes better when shared, but this pink velvet creation feels especially memorable—it’s the kind of recipe that adds its own sparkle to joyful milestones.
Recipe FAQs
- → Can I use sparkling rosé instead of still rosé?
Yes. A dry sparkling rosé adds a subtle bright note; the bubbles mostly dissipate during mixing and baking but leave a light floral fruitiness. Reduce added liquid slightly if batter seems too loose.
- → How do I prevent the pink color from fading or running?
Use gel or paste food coloring for a concentrated hue without adding liquid. Mix color into the batter just until uniform, and avoid overmixing. Chill layers before final icing to lock in the shade during handling.
- → What's the best way to stabilize the rosé buttercream?
Start with room-temperature butter whipped until light, then add sifted powdered sugar gradually. Add rosé a tablespoon at a time until desired flavor and texture are reached. Chilling briefly between additions helps maintain structure; for warmer environments, add a small amount of powdered sugar to firm up the buttercream.
- → How do I get a smooth, even gold drip?
Melt white chocolate with cream and cool slightly so the drip is fluid but not hot. Test drip consistency on the back of a spoon first. Pour slowly around the edge and let gravity form the drips. Once set, mix luster dust with a clear food-safe extract or high-proof clear spirit and paint the drips for a metallic finish.
- → Can I omit alcohol from the components?
Yes. Substitute the rosé with equal parts fruit juice (like white grape or apple) or a light tea infusion for flavor. For the gold paint, use clear lemon extract or food-grade glycerin instead of vodka.
- → How should I store the finished cake and how long does it keep?
Store the assembled cake refrigerated in a cake box or covered loosely to protect decorations. It keeps well for 2–3 days; bring to room temperature for 30–60 minutes before serving for best texture and flavor.