 Pin It
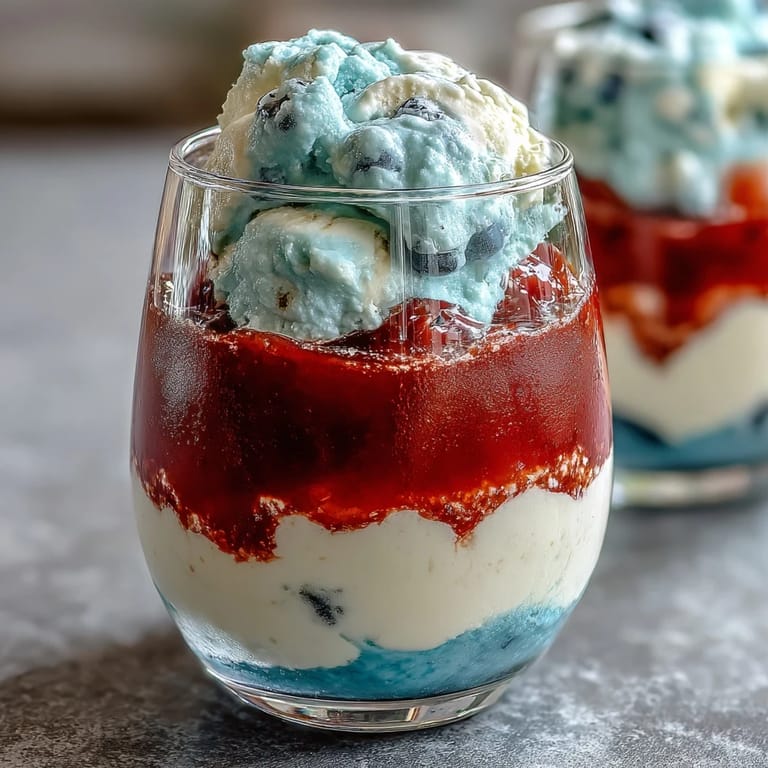
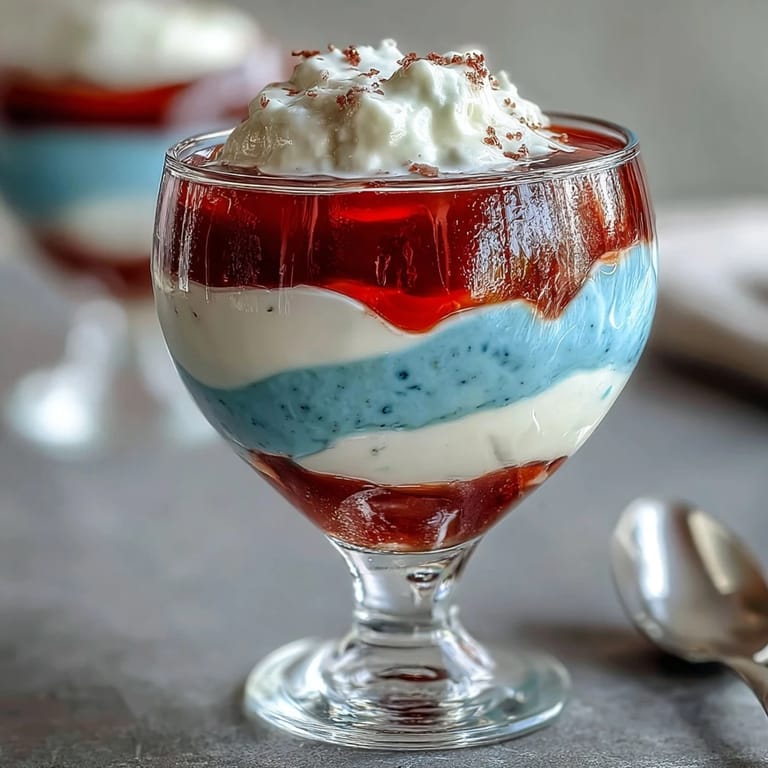
 My daughter came home from school with a assignment: bring something red, white, and blue for the Fourth of July potluck. I stood in the kitchen that evening, realizing I had no time for baking, when I spotted a box of strawberry Jello in the pantry and suddenly saw it—layers of color stacked in clear cups like edible fireworks. She helped me pour each stripe, carefully waiting between rounds, and by the time we pulled them from the fridge, we'd created something that looked far more complicated than it actually was.
What surprised me most was watching my eight-year-old take ownership of the project—she decided which berries went on top, adjusted the whipped cream, and felt genuine pride serving them to her friends. That's when I realized these cups weren't really about the Jello at all, but about creating a moment where someone young felt like a real cook.
Ingredients
- Strawberry or cherry Jello (3 oz box): The red layer needs bold flavor that doesn't get lost when chilled; this powder dissolves cleanly if you truly let the boiling water do its work for a full minute.
- Boiling water: Temperature matters more than you'd think—if it's tepid, your gelatin won't set properly, so use water that's genuinely rolling.
- Cold water: This stops the cooking and brings everything to the right consistency; don't skip it or your layers will be too firm.
- Unflavored gelatin (one envelope): This is the secret to the white layer's creamy texture that flavored Jello alone can't achieve; let it bloom in cold water like you're waking it up gently.
- Sweetened condensed milk: It creates that silky white stripe and balances the fruity layers; room temperature milk blends in smoothly without creating lumps.
- Blue raspberry Jello (3 oz box): The final layer should complement rather than compete, so blue raspberry plays well with the red without muddying the colors.
- Whipped cream and fresh berries (optional): These finish the look, but they're truly optional—the layers alone are stunning.
Tired of Takeout? 🥡
Get 10 meals you can make faster than delivery arrives. Seriously.
One email. No spam. Unsubscribe anytime.
Instructions
- Set up your cups strategically:
- Line eight clear cups in a muffin tin or stable surface where they won't tip over; this matters because you're about to tilt them, and a spilled Jello layer is a lesson you learn once.
- Create the red base:
- Pour boiling water over the strawberry Jello and stir for a solid minute until every granule disappears, then add cold water. Divide between cups so each gets about two tablespoons, creating a thin red line at the bottom.
- Tilt and chill the red layer:
- Lean your cups at an angle in the muffin tin and refrigerate for forty-five to sixty minutes until the Jello feels set when you tap it gently; you're aiming for firm enough to hold the next layer without the new liquid sinking through.
- Bloom the white layer's gelatin:
- Sprinkle unflavored gelatin over cold water and let it sit for five minutes—this seems like a small step, but it prevents grainy texture that happens when you add boiling water to dry powder. Then add boiling water and stir until completely smooth before mixing in the sweetened condensed milk.
- Cool the white mixture:
- Set the white mixture aside at room temperature for about fifteen minutes so it's warm enough to pour smoothly but cool enough not to melt the red layer. This temperature awareness is the difference between layers that stay distinct and layers that blur together.
- Layer the white stripe:
- Once red is set, stand your cups upright and pour two tablespoons of white mixture into each, pouring slowly down the side of the cup so it settles gently on top. Refrigerate for forty-five to sixty minutes until this layer firms up completely.
- Prepare and cool the blue layer:
- Dissolve blue Jello in boiling water the same way you did the red, stir in cold water, then let it cool to room temperature before pouring. If you add warm blue Jello to the white layer, the heat will soften what you've worked to set.
- Complete the stack:
- Pour blue Jello gently over the white layer, using about two tablespoons per cup, and refrigerate upright for at least two hours—this final chill is when your patience truly pays off and the stripes stay bright and defined.
- Garnish and serve:
- Top with whipped cream and fresh berries just before serving so the cream stays fluffy and the berries glisten.
 Pin It
 Years later, my daughter still requests these for her birthday despite being old enough to make them herself, and I think that's because food tied to pride and participation tastes different than food that simply appears. These cups taught her that impressive things are often just small, careful steps repeated.
The Angled Chill Trick
When the first red layer sets at an angle in the muffin tin, you're not being fussy—you're creating a larger surface area so the white layer spreads evenly when you pour it. I learned this the hard way by pouring straight into upright cups and ending up with a lopsided stripe that still tasted great but looked unbalanced. The muffin tin holds the cups steady and keeps them tilted just enough that gravity helps you, not against you.
Why Clear Cups Change Everything
Those clear cups are doing more work than just holding Jello—they're showcasing your layers like little edible jewelry boxes. Opaque cups would taste identical but feel like you missed the whole point of the color payoff. Every time someone lifts one of these to the light or holds it up to admire, you'll see that moment of recognition where the dessert becomes something worth pausing for.
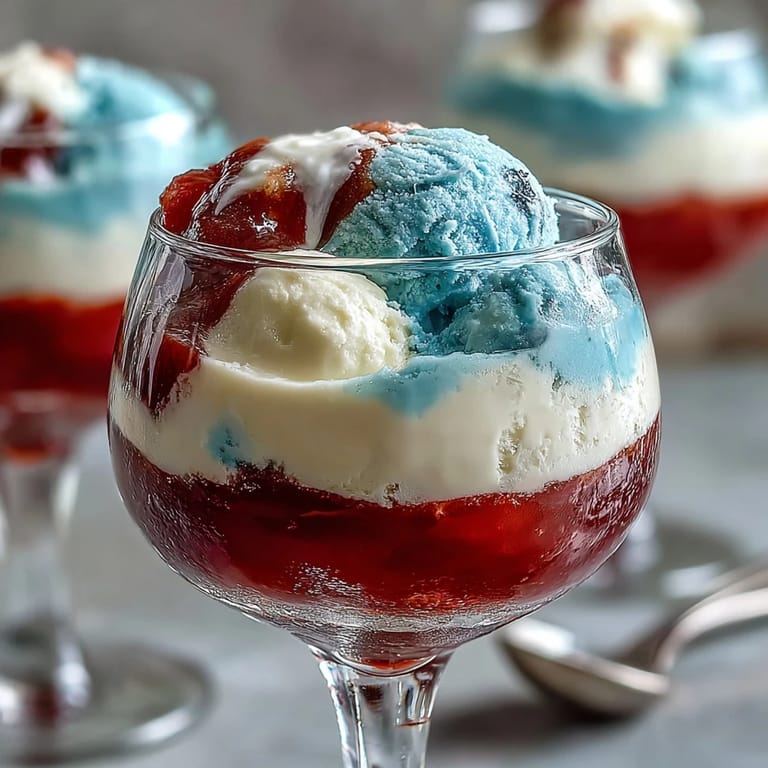
Flavors That Work and Why
Strawberry and blue raspberry are classic pairings because they're fruity enough to feel special without clashing, and the sweetened condensed milk white layer acts like a palate cleanser between them. I've experimented with cherry and blackberry, lime and strawberry, and even raspberry with blueberry—the only rule is avoid flavors that turn muddy brown when they touch. The condensed milk layer needs no flavoring because it's already sweet and acts as the neutral bridge that lets the red and blue sing.
- Swap the red layer for cherry if you want deeper, richer fruit flavor that doesn't feel quite as summery.
- Always taste your sweetened condensed milk brand before mixing because some are sweeter than others, which affects the white layer's balance.
- Make these ahead up to the morning of your event—they hold their shape and color brilliantly for a full day in the refrigerator.
 Pin It
 These cups sit at that perfect intersection of easy and showy, which makes them a secret weapon for anyone who wants to bring something that feels homemade and special without spending hours in the kitchen. They prove that good food doesn't require complicated techniques, just intention and patience.
Recipe FAQs
- → How do I ensure clean layers in these cups?
Allow each layer to fully chill and set before adding the next to maintain distinct, sharp stripes in the cups.
- → Can I substitute dairy ingredients in the white layer?
Yes, swap sweetened condensed milk with coconut milk and sugar for a dairy-free alternative in the creamy middle layer.
- → What flavors are recommended for the red and blue layers?
Strawberry or cherry works well for the red layer; blue raspberry is a great choice for the blue layer, but berry flavor swaps are flexible.
- → What tools help chill the cups at an angle?
A muffin tin can hold the clear cups at a slight angle during chilling to create slanted layers for a fun look.
- → Is this suitable for gluten-free diets?
Yes, the ingredients used are gluten-free, but verify specific brands of gelatin and condensed milk to avoid hidden gluten.