Pin It
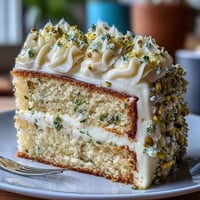
 Last spring, I was tasked with bringing dessert to a potluck on a day when my oven had decided to stop working entirely. Standing in my kitchen, staring at my broken stovetop, I suddenly remembered a jar of lemon curd hiding in the back of my fridge and realized I didn't need heat to make something spectacular. These no-bake lemon cheesecake jars came together in twenty minutes, and by the time I arrived at that gathering, I'd made something that felt both effortless and elegant. The layers spoke for themselves—buttery crust, clouds of tangy cream cheese, and that bright lemon finish that made everyone ask for the recipe before they'd even finished eating.
My daughter once asked why I was whipping cream with such focus, and when I explained we were making dessert in jars, her eyes lit up in a way that reminded me why I love cooking. She helped layer the crusts, watched the whipped cream transform, and by the time we topped them with lemon curd and berries, she felt like she'd made something real. These jars have since become her request for every dinner party, and there's something genuinely special about a dessert that even curious kids can help assemble.
Ingredients
- Graham cracker crumbs (1 cup): These form the crust, and while you can buy pre-crushed, pulsing your own crackers in a food processor gives you control over texture—some prefer fine crumbs, others like tiny chunks for contrast.
- Unsalted butter (3 tablespoons, melted): Melted butter binds the crumbs and adds richness; make sure it's actually melted and slightly cooled so it distributes evenly.
- Granulated sugar (2 tablespoons): This sweetens the crust layer and balances the saltiness of the crackers.
- Heavy whipping cream (1 cup, cold): Cold cream whips faster and holds peaks better, so don't skip chilling it beforehand—this is where texture really matters.
- Cream cheese (8 oz, softened): Room temperature cream cheese blends smoothly without lumps; pulling it out thirty minutes before you start makes a visible difference.
- Powdered sugar (1/2 cup): This dissolves faster than granulated sugar and creates a silkier filling texture.
- Fresh lemon juice (1/4 cup) and zest (1 tablespoon): The juice brightens the filling while zest adds visual appeal and concentrated lemon flavor that powdered versions can't match.
- Vanilla extract (1 teaspoon): A small amount deepens the lemon flavor rather than masking it.
- Lemon curd (1/2 cup): This tangy topping is the finishing touch that ties everything together; homemade or store-bought both work beautifully.
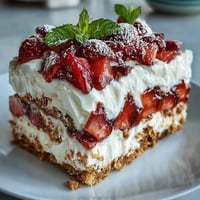
- Fresh berries: Raspberries and blueberries add color, texture, and a touch of tartness that complements the lemon perfectly.
Tired of Takeout? 🥡
Get 10 meals you can make faster than delivery arrives. Seriously.
One email. No spam. Unsubscribe anytime.
Instructions
- Combine and press the crust:
- Mix your graham cracker crumbs, melted butter, sugar, and salt until it resembles wet sand—you'll know it's right when you can squeeze it and it holds together. Press about two tablespoons firmly into the bottom of each jar so it forms a solid, even layer that won't shift when you add the creamy filling.
- Whip the cream to peaks:
- Using cold heavy cream and a mixer, beat it until stiff peaks form—this takes about three to five minutes and you'll see the transformation from liquid to cloud. Set it aside in a clean bowl, and don't wash the mixer yet because you'll use it immediately for the next step.
- Blend the cheesecake filling:
- Start by beating softened cream cheese until it's completely smooth with no lumps, then add powdered sugar, lemon juice, zest, and vanilla extract and mix until creamy. This should take about two minutes and taste bright and balanced when you sneak a spoonful.
- Fold cream into cheese mixture:
- This is the gentle step—use a spatula to fold the whipped cream into the lemon mixture in a few additions, being careful not to deflate all those beautiful air bubbles. You want it fully combined but still fluffy and light.
- Layer and chill:
- Spoon or pipe the filling over the crusts, dividing it evenly among the six jars, then top each with a generous spoonful of lemon curd. Cover them and refrigerate for at least two hours, though they're even better if you leave them overnight because the flavors meld and the texture becomes perfectly set.
 Pin It
 There's a quiet satisfaction in pulling these jars from the fridge at the moment someone says they're still hungry for dessert, knowing you've had the answer waiting the whole time. That feeling—of being prepared and generous at once—is what keeps me making them.
Making Them Your Own
The beauty of this recipe is its flexibility; once you understand the basic structure, you can riff on it endlessly. I've made versions with lime instead of lemon, added a layer of berry coulis between the crust and filling, and even experimented with mascarpone instead of some of the cream cheese for a richer, slightly less tangy result. One friend substituted crushed pistachios for graham crackers because her son has a gluten sensitivity, and honestly, those versions became my favorite—the nutty flavor against the bright lemon creates something unexpectedly sophisticated.
Timing and Make-Ahead Strategy
These jars are a weekday dinner party secret because you can assemble them the morning of or even the night before, and they actually improve as they sit. The crust softens slightly, the filling sets to the perfect spoonable consistency, and the flavors have time to become friends rather than strangers. If you're short on time, even an hour of chilling works in a pinch, though you'll notice the filling is slightly softer—not a problem, just a different texture.
Storage and Serving Suggestions
Keep these covered in the refrigerator for up to three days, and they travel beautifully if you're bringing them somewhere—the jars do all the work of protecting the delicate layers. I've learned to let them sit at room temperature for about five minutes before serving because it makes the filling slightly softer and the flavors sing a little brighter, plus the spoon glides through more easily than when they're ice cold.
- If you're serving a crowd, assemble them in jars but hold the berries and lemon zest garnish until just before serving so they stay fresh and don't weep into the filling.
- You can make individual components up to two days ahead and layer everything on the day you plan to serve, which spreads out the work nicely.
- These are perfect for spring gatherings, Mother's Day brunches, or any time you want something that feels fancy without the stress of timing a bake.
 Pin It
 These jars remind me that the best desserts aren't always the ones that require the most skill or equipment; sometimes they're the ones that come together when you're paying attention to what you have on hand. Make them, share them, and watch how a simple combination of layers becomes the moment someone remembers.
Recipe FAQs
- → Can I use different crusts for this dessert?
Yes, you can substitute the graham cracker crust with gluten-free cookies or crushed nuts for variation.
- → How long should the jars be chilled?
Chill the jars for at least 2 hours to allow the filling to set properly for the best texture.
- → Can I prepare these jars in advance?
Absolutely, these jars can be made ahead and stored refrigerated until ready to serve.
- → What toppings work best with the lemon cheesecake?
Fresh berries and extra lemon zest are excellent toppings that add freshness and visual appeal.
- → Is it possible to use mascarpone instead of cream cheese?
Yes, substituting mascarpone yields a richer, creamier filling with a slightly different flavor profile.