 Pin It
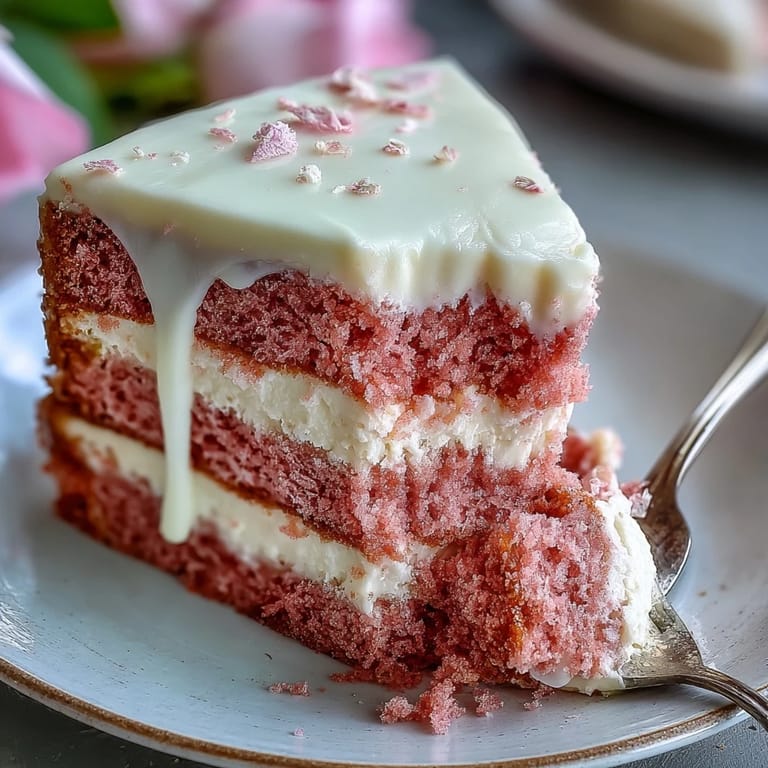
 Sometimes, inspiration strikes when you least expect it—like when I opened a bottle of rosé one spring afternoon and the scent instantly made me crave something celebratory and playful. Experimenting with cake batters while that delicate floral aroma lingered in the air was more fun than I care to admit. My first attempt was far from perfection: a slouching pink cake with streaks of uneven color. I laughed it off, made another batch, and soon enough stumbled on the ideal blend of rosy flavor and tender crumb. The gold drip, a glitzy afterthought, was the finishing touch that turned it into a party centerpiece.
Last spring, I brought this Rosé Velvet Cake to a bridal shower and watched the mood shift as soon as it hit the dessert table: faces lit up, cameras came out, and by the end of the party I was passing around napkins to jot down the recipe for new friends. That day taught me that while cake is always welcome, this cake makes people smile before the first bite.
Ingredients
- Cake flour: Gives the cake a delicate, fine crumb – sifting is essential for that signature velvet texture.
- Granulated sugar: Sweetens the cake, but also helps give it a beautiful golden crust; I learned that superfine sugar works if you want a silkier finish.
- Baking powder and baking soda: The duo that makes the cake rise gently – double-check freshness for the best lift.
- Salt: Just a pinch balances the sweetness and highlights the delicate wine notes.
- Unsalted butter: Let it soften on the counter for at least 30 minutes so it creams easily and blends seamlessly with the oil.
- Vegetable oil: Keeps the crumb extra moist and tender, even after refrigerating.
- Eggs: Always use them at room temperature; cold eggs can cause the batter to curdle.
- Rosé wine (not sparkling): Brings a beautiful blush and gentle berry aroma—avoid sweet or bubbly rosé for better structure.
- Vanilla extract: Rounds out the flavors and makes the kitchen smell amazing.
- White vinegar: The secret to reacting with the baking soda, giving the cake just a hint of tang.
- Pink gel food coloring (optional): Gives the most vivid color without watering down your batter.
- Cream cheese: For a tangy, rich frosting with enough body to support the layers; softer cream cheese whips up most smoothly.
- Powdered sugar: Sift well to avoid lumps and ensure a fluffy finish.
- Heavy cream: The backbone of your white chocolate drip—it needs to be just hot enough to melt but not so hot it scorches.
- White chocolate: Provides the glossy canvas for your glamorous gold finish—choose high-quality for easier melting.
- Edible gold luster dust and vodka or lemon extract: For shimmering accents—start with a few drops to mix, then adjust the consistency as you go.
Tired of Takeout? 🥡
Get 10 meals you can make faster than delivery arrives. Seriously.
One email. No spam. Unsubscribe anytime.
Instructions
- Set the scene:
- Preheat your oven to 350°F (175°C) and line three 8-inch cake pans with parchment; a bit of butter in the corners ensures no sticking.
- Mix the dry ingredients:
- Whisk together flour, baking powder, baking soda, and salt until the mixture feels light and looks uniform, like soft sand.
- Cream the fats and sugar:
- Beat butter, oil, and sugar with an electric mixer until the mixture is pale and fluffy – you’ll hear it thicken and see it lighten.
- Build the batter:
- Add eggs one at a time, mixing thoroughly, then stir in vanilla and vinegar; the batter should smell sweet and a little tart.
- Combine wet and dry:
- Alternate adding the flour mixture and rosé, finishing with flour; if using food coloring, swirl it in now, and mix just until no streaks remain.
- Bake the layers:
- Divide evenly among the pans and smooth the tops; bake for 30–35 minutes until a toothpick comes out clean and the kitchen smells heavenly.
- Cool the cakes:
- Let the cakes rest in the pans for 10 minutes, then gently turn them onto wire racks and let them cool completely (don’t rush, or the frosting will melt).
- Make the frosting:
- Beat cream cheese and butter until smooth and creamy, then slowly add powdered sugar; finish with vanilla and a pinch of salt, and chill if needed to thicken.
- Assemble the cake:
- Place one cake layer on a plate, slather on frosting, repeat, and cover the whole cake—don’t worry if it’s rustic, swirls add character.
- Gold drip magic:
- Melt cream and white chocolate together, cool slightly, then let it drip dramatically over the cold cake’s edges; pop the cake in the fridge for 15 minutes to set.
- Paint on the gold:
- Mix luster dust with vodka or extract to create a metallic paint, and brush it lovingly onto the hardened drips—it’s art, not science.
 Pin It
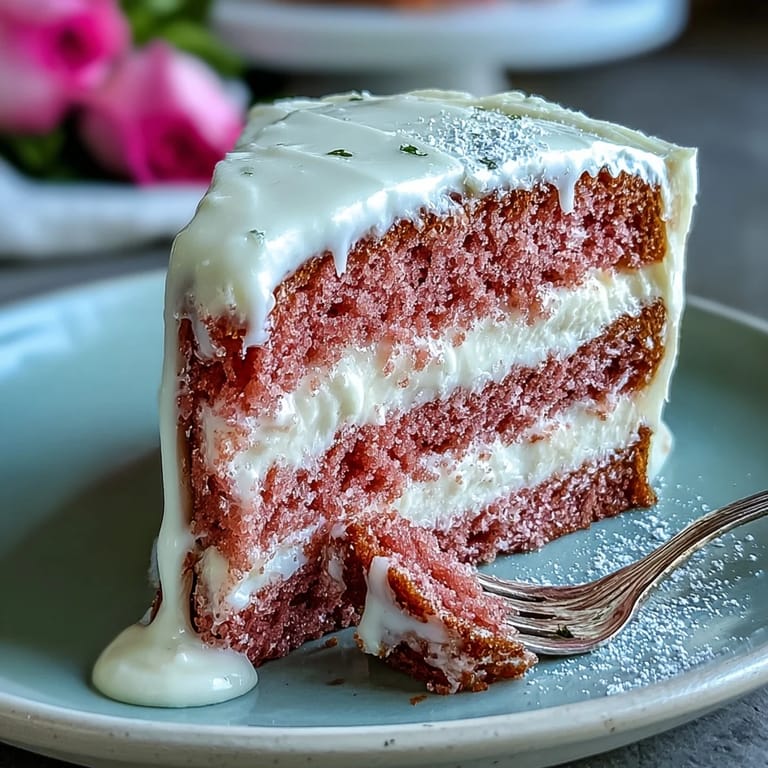
 Watching the cake glisten with gold at my cousin&apost;s engagement party, I realized no one was just eating dessert—they were celebrating. That flicker of awe and excitement around the table made every minute spent in the kitchen absolutely worth it.
Choosing the Right Rosé
After a few trials, I found that a dry, non-sparkling rosé with floral notes works best—anything too sweet can make the cake taste cloying. If you're unsure, give your wine a quick taste before baking, and remember, if you wouldn't drink it, don't bake with it.
Mastering the Gold Drip
I used to rush the drip and ended up with puddles at the bottom. Now, making sure the ganache cools for a few minutes before adding it to the chilled cake changed everything—those languid, dramatic drips hold their shape perfectly. Painting on the gold is easiest with a small, food-safe brush and a steady hand.
Serving, Storing, and Making Ahead
This cake stays wonderfully moist for up to three days when kept chilled, and the flavors deepen by day two. Decorate shortly before serving for the most dazzling finish, especially if you plan to show it off at an event.
- Let refrigerated cake sit at room temperature for 30 minutes before slicing.
- Store leftovers covered to keep the frosting silky and fresh.
- Gold luster dust is best applied just after chilling, when the chocolate is firm.
 Pin It
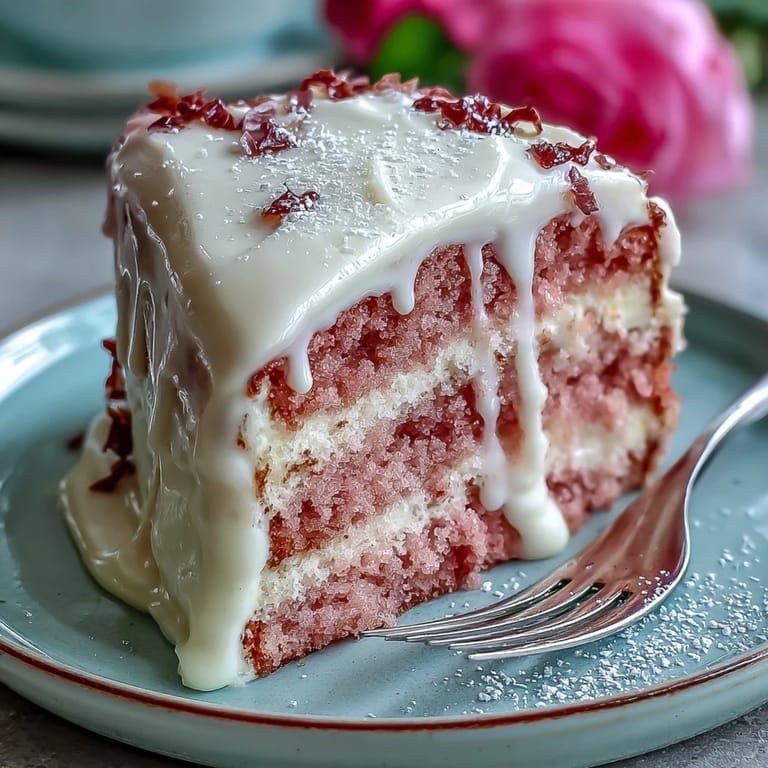
 Whether for showers, birthdays, or whenever you need something a bit magical, this Rosé Velvet Cake always brings the sparkle. Here&aposs; to small celebrations that deserve a golden finish!
Recipe FAQs
- → Can I make this alcohol-free?
Yes. Substitute equal parts pink grape juice plus a splash of lemon juice for the rosé to preserve acidity and color without alcohol.
- → How do I get a deeper pink hue?
Use a concentrated gel food coloring and add a small amount to the batter after mixing in the rosé; gels provide vivid color without thinning the batter.
- → How do I achieve a smooth cream cheese finish?
Chill the frosted cake briefly between crumb coat and final coat, and use an offset spatula or bench scraper while rotating the cake for even, clean sides.
- → How thin should the white chocolate drip be?
Warm cream poured over chopped white chocolate should create a pourable ganache that slowly flows over the edge; let it cool slightly so drips hold shape rather than run straight down.
- → Is edible gold luster dust safe to use?
Use only food-grade luster dust labeled for direct food contact. Mix with a small amount of vodka or lemon extract to make a paint; verify the product's safety and allergen info first.
- → How should I store the finished cake?
Refrigerate the cake to keep the cream cheese frosting stable. Bring to room temperature for 30–60 minutes before serving for the best texture and flavor.