 Pin It
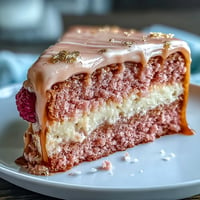
 The first time pastel ombre cake came into my kitchen, the sunlight made the vanilla batter glow gleamingly pink and yellow. It wasn't a grand occasion—just an impulse after spotting edible flowers at the market, and suddenly I was elbow-deep in flour on a Thursday afternoon, humming spring tunes. The colors felt quietly magical as they streaked through the bowls, reminding me how playful baking can be. Halfway through, I laughed at my mismatched oven mitts and got icing sugar everywhere. Little kitchen moments like these add a touch of whimsy to baking days.
The last time I made this for my friend's birthday, we spent the afternoon gossiping and painting cake layers together. Mixing pastel colors, we swapped tips and joked about whose frosting technique was more artistic. The kitchen filled with laughter and the scent of vanilla, and by the end, our hands were stained pink and blue—a badge of honor for any baker. Sharing the cake felt like sharing spring itself.
Ingredients
- All-purpose flour: Ensures the cake is sturdy yet tender; measure by scooping and leveling for accuracy.
- Baking powder & baking soda: Keeps layers light and airy—double check their freshness before baking.
- Salt: Always vital to balance sweetness—never skip it.
- Unsalted butter: Room temperature helps produce a creamy batter and silky frosting; I let mine sit out for at least an hour.
- Granulated sugar: Creams smoothly into the butter, making the cake fluffy.
- Eggs: Room temp eggs blend better, leading to even cake layers—take them out before you start.
- Vanilla extract: Pure vanilla gives a richer aroma; I once accidentally used imitation and regretted it.
- Whole milk: The higher fat content keeps the crumb soft.
- Gel food coloring: Pastel gel colors yield brilliant ombre hues without thinning batter.
- Powdered sugar: Sifting prevents lumpy frosting.
- Edible flowers: Organic blooms are essential—double check labels for safety.
Tired of Takeout? 🥡
Get 10 meals you can make faster than delivery arrives. Seriously.
One email. No spam. Unsubscribe anytime.
Instructions
- Get the pans ready:
- Grease three 8-inch cake pans and line them with parchment; you'll thank yourself when layers pop out easily.
- Mix dry ingredients:
- Whisk together flour, baking powder, baking soda, and salt until the mix feels smooth—no lumps or clumps allowed.
- Cream butter and sugar:
- Beat butter and sugar until pale and fluffy, savoring how the mixture turns almost cloud-like; take your time here.
- Add eggs and vanilla:
- Add eggs one at a time, mixing well, then stir in vanilla extract; listen for the soft sound of batter thickening.
- Combine and color:
- Alternate flour and milk additions, mixing gently. Divide batter and swirl pastel colors into each bowl, watching the ombre effect bloom.
- Bake the layers:
- Pour colored batter into pans and bake for 25–30 minutes; your kitchen will smell buttery and sweet. Cool in pans for 10 minutes before turning onto racks.
- Prepare buttercream:
- Beat butter until creamy, add sifted powdered sugar, vanilla, and milk. Color portions with pastel gel, enjoying the creative part.
- Assemble and frost:
- Level cakes if needed. Layer and spread buttercream, apply a crumb coat, chill, then frost with blended pastel shades for a dreamy finish.
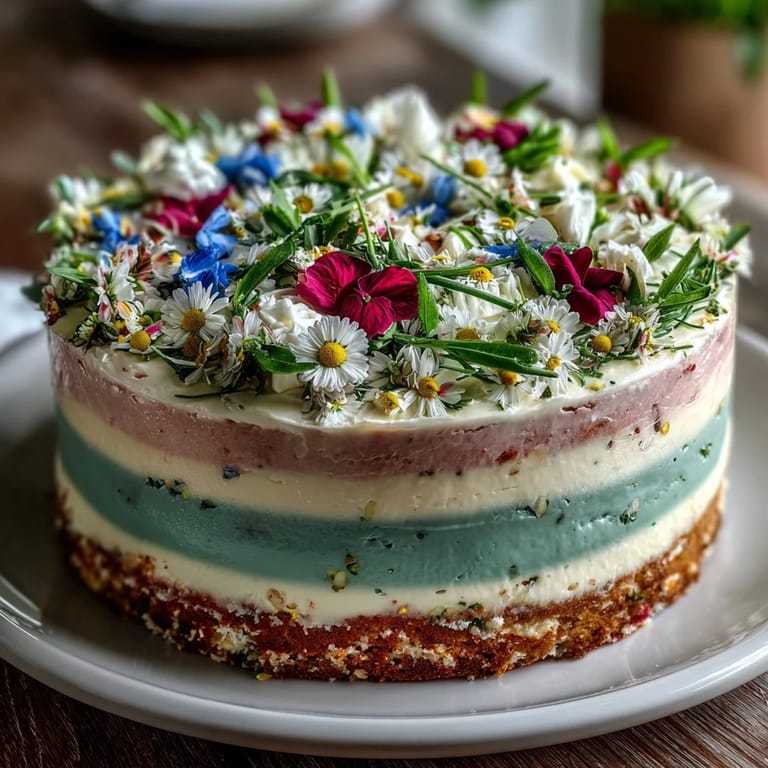
- Add floral topper:
- Arrange edible flowers gently on top, just before serving; admire your handiwork.
 Pin It
 When someone took the first bite at our spring brunch, there was a pause and a little gasp. Suddenly, a cake meant just for dessert turned into a centerpiece—everyone piled around for slices and flower picking, and I realized I had baked more than food. It became a shared memory, colorful and joyful.
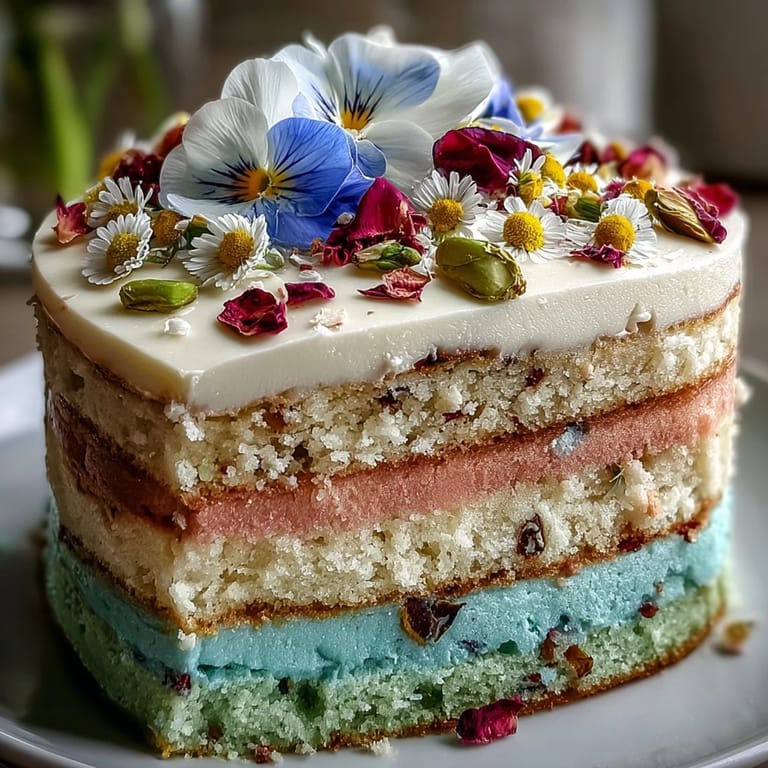
How to Create a Perfect Ombre Effect
Swirling pastel gel through batter is a playful step—use a light touch to keep colors bright but not streaky. Divide the frosting too, and use small spatulas or spoons for blending shades on the cake's side. Working slowly gives the ombre effect a dreamy gradient, and if you make a mistake, a quick fix is to add a little more of the next color and blend gently.
Choosing & Handling Edible Flowers
Always choose edible flowers from trusted sources—never pick from the garden unless you know they're organic and safe. Handle flowers carefully with clean dry hands, and arrange them just before serving so they stay fresh and vibrant. Refrigerate extras loosely wrapped in paper towels to prevent wilting.
Troubleshooting Layer Cakes in Real Life
If your layers dome too much, gently shave the tops with a serrated knife for perfect stacking. Sometimes, a cake pan sticks—run a thin knife around the edge before turning out. Always let cakes cool completely before frosting, or the buttercream will melt and slide.
- Use parchment paper circles for zero sticking.
- Chill cake layers briefly if buttercream gets too soft.
- Bake all layers at once for even coloring.
 Pin It
 This pastel ombre cake always brings smiles and bright conversation, no matter the weather or company. May your kitchen be as colorful as your celebrations.
Recipe FAQs
- → How do I achieve soft ombre colors in the cake layers?
Use gel food coloring to tint each bowl of batter with different pastel shades. Mix gently for a subtle gradient, avoiding overmixing.
- → What edible flowers are suitable for topping?
Popular choices include pansies, violas, roses, and chamomile. Ensure they’re organic and specifically labeled edible.
- → Can the cake be made vegan?
Yes, substitute plant-based butter, milk, and egg replacers for a delicious vegan alternative. Always check flower suitability.
- → What tools are recommended for assembly?
Prepare with three 8-inch pans, an electric mixer, mixing bowls, spatulas, wire rack, and optionally a cake turntable for easier frosting.
- → How is the floral topper arranged?
Arrange the edible flowers gently on top after frosting, creating a natural yet striking centerpiece for the cake.
- → Is crumb coating necessary?
Applying a crumb coat before final frosting helps achieve smooth ombre buttercream layers. Chill the cake for best results.