 Pin It
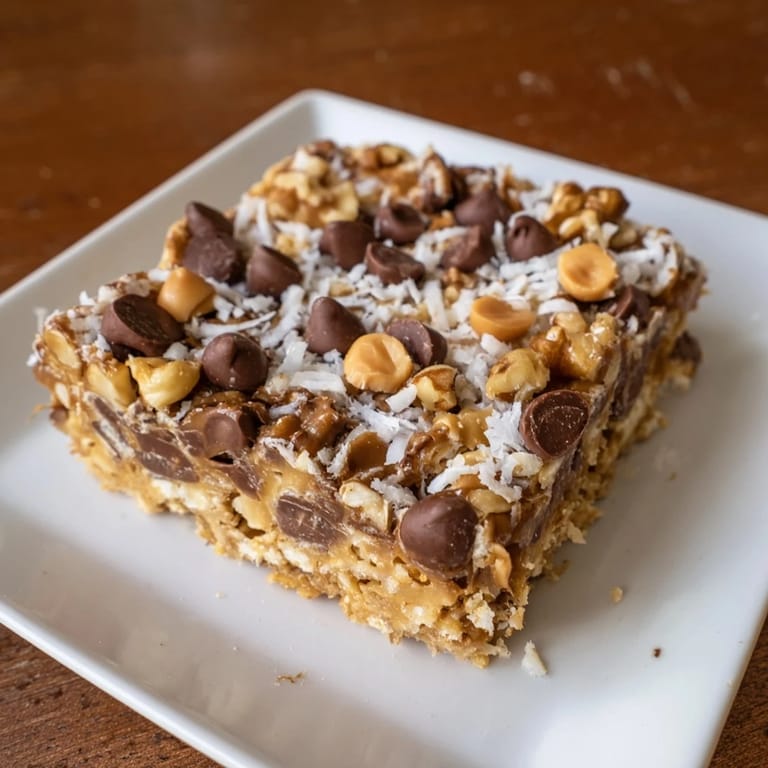
 My neighbor Sarah brought these to a block party on a sweltering July afternoon, and I watched them disappear faster than any homemade dessert I'd ever seen. She called them Hello Dolly Bars and swore they were the easiest thing she'd ever baked, which seemed impossible given how decadent they looked. I asked for the recipe that same evening, and by the next weekend, my kitchen smelled like toasted coconut and melted chocolate while I pressed graham cracker crumbs into a pan. That first batch taught me that sometimes the simplest recipes create the most memorable moments.
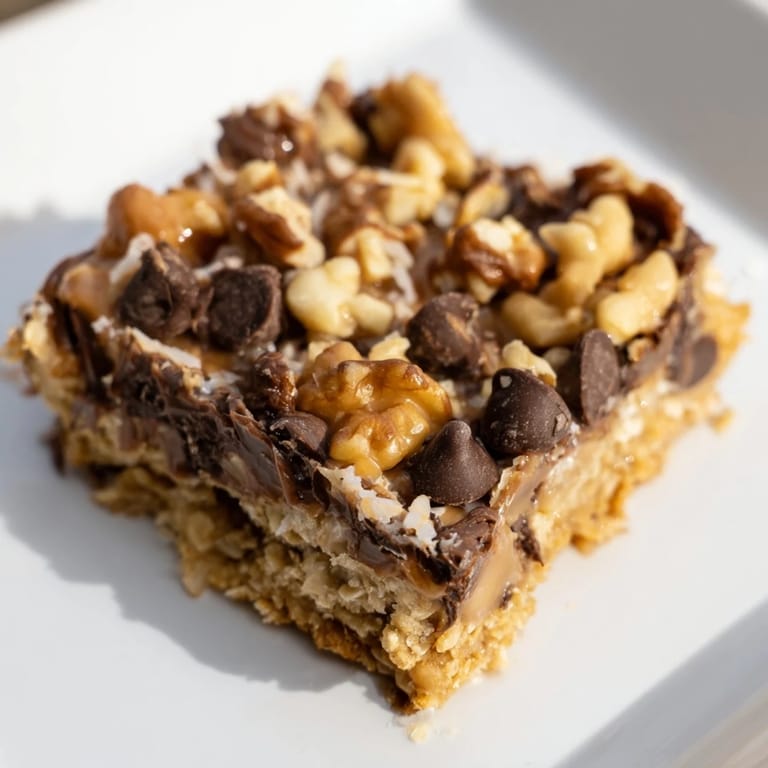
I made these for my daughter's school bake sale last spring, and a dad I'd never met before came back specifically to buy another batch. He'd eaten one while standing in the school hallway and apparently told everyone he encountered that they were life-changing, which felt like the highest compliment a seven-dollar box of bars could receive. Watching people's faces light up when they bit through that chocolate and butterscotch layer into the chewy coconut middle never gets old.
Ingredients
- Graham cracker crumbs: The foundation that holds everything together; make sure to crush them into fairly uniform pieces rather than powder-fine dust, which can get too dense and gummy.
- Unsalted butter, melted: Bind the crust and add richness; melting it first helps it distribute evenly through the crumbs.
- Semisweet chocolate chips: Classic choice that balances sweetness with subtle cocoa depth without overpowering the other layers.
- Butterscotch chips: These are optional but worth seeking out; they add a toffee-like note that makes people wonder what secret ingredient you used.
- Walnuts or pecans: Chopped roughly so you get actual texture; they add earthiness and prevent the bars from feeling too one-note sweet.
- Sweetened shredded coconut: Look for the regular shredded kind, not the fine or flaked version, which can pack down too tightly.
- Sweetened condensed milk: This is the secret binder that transforms separate layers into one cohesive, chewy bar; don't skip it or substitute evaporated milk.
Tired of Takeout? 🥡
Get 10 meals you can make faster than delivery arrives. Seriously.
One email. No spam. Unsubscribe anytime.
Instructions
- Set up your oven and pan:
- Preheat to 350°F and line your 9x13 pan with parchment paper if you have it; this step makes removal infinitely easier once everything's baked. A lightly greased pan works too, but you'll appreciate the parchment when it's time to slice.
- Mix and press the crust:
- Combine graham cracker crumbs with melted butter in a bowl until the mixture resembles wet sand, then press it firmly and evenly across the bottom of your pan. It should feel sturdy but not compacted so hard that it becomes a tough brick.
- Layer your toppings:
- Sprinkle chocolate chips first, then butterscotch, nuts, and coconut in that order, sprinkling each layer evenly rather than piling it all in one corner. The layers don't need to be perfectly precise; nature and heat will do their job anyway.
- Pour the milk:
- Slowly drizzle the sweetened condensed milk over everything, using a spatula to help it flow into the gaps and coat all the layers underneath. You'll see it seeping down and binding everything together almost immediately.
- Bake until golden:
- Watch for the edges to turn golden brown and the center to look set and slightly firm when you jiggle the pan gently, which usually takes 23 to 27 minutes. Overbaking makes them crispy rather than chewy, so err on the side of pulling them out a minute early.
- Cool and cut:
- Let them cool completely in the pan before attempting to remove them; this takes patience but ensures clean cuts. Once cooled, lift out with the parchment and use a sharp knife to slice into 16 bars, wiping the blade between cuts for clean edges.
 Pin It
 My eight-year-old nephew asked me recently why I always made these instead of buying fancy desserts from the bakery, and I realized it's because they represent something I value about cooking for people. There's honesty in a recipe this straightforward, and somehow that simplicity makes the treat feel more genuine.
The Beauty of a One-Pan Dessert
There's something deeply satisfying about baking an entire dessert in a single pan with just a mixing bowl and a spatula. No creaming butter and sugar, no whipping egg whites, no waiting for dough to chill overnight. These bars respect your time and your energy while still delivering something restaurant-worthy in taste and texture.
Playing with Flavors and Textures
Once you've made these once, the formula invites experimentation without risk. I've made a batch with all dark chocolate and no butterscotch for deeper cocoa notes, another version with white chocolate and macadamia nuts when a friend mentioned a craving, and even a nut-free batch using sunflower seeds when my sister mentioned her son's allergy. Each variation tastes distinctly different while maintaining that perfect chewy-crispy balance.
Storage, Serving, and Timing
These bars stay fresh and chewy in an airtight container at room temperature for about five days, though they rarely last that long in my house. I've learned to cut them into 16 pieces because that's the sweetness-to-indulgence ratio that feels just right, though you can cut them larger if you prefer fewer, more decadent bites. They also freeze beautifully if you want to stash them for unexpected guests or for moments when you need a small pick-me-up.
- Bring them to room temperature for about 10 minutes before eating if you've stored them in the fridge; cold bars lose some of their chewy texture.
- Pack them individually in wax paper if you're bringing them somewhere, as they do release a bit of oil and can stick to paper if left unwrapped.
- Double the recipe if you're feeding a crowd; you'll wish you had more, and the baking time stays roughly the same in two pans.
 Pin It
 These bars have become my go-to when I need to bring something to a gathering and want to feel confident it will disappear and make people happy. There's real joy in that.
Recipe FAQs
- → What baking pan size is needed?
A 9x13-inch (23x33 cm) pan works perfectly for even baking and the right thickness.
- → Can nuts be omitted or substituted?
Yes, nuts can be omitted for allergies or replaced with sunflower seeds for similar crunch.
- → How do I know when bars are done baking?
Look for golden edges and a set center after baking for about 23–27 minutes.
- → Can I use different types of chocolate chips?
Dark or white chocolate chips can replace semisweet or butterscotch chips for flavor variation.
- → How should the bars be stored?
Keep bars in an airtight container at room temperature for up to five days to maintain freshness.