 Pin It
 My neighbor Sarah showed up at my door one afternoon with a jar of homemade peanut butter and a challenge: make something that tastes better than the store-bought kind. I'd made these cookies dozens of times, but never quite thought about them as anything special until that moment. The smell of them baking filled my kitchen with this warm, almost sweet-and-salty comfort that made everything else fade away. She sat at my counter while they cooled, and we split one right off the rack—it was still soft in the middle, with that perfect nutty flavor that makes you close your eyes for a second. That's when I realized these aren't just cookies; they're a conversation starter.
I brought these to my son's basketball game once, tucked in a container I thought was secure. Wasn't. By halftime, there were cookie crumbs everywhere, and three other parents had asked for the recipe. My kid was embarrassed but also kind of proud, which told me something about what food actually means to people beyond just tasting good.
Ingredients
- All-purpose flour (1 1/4 cups): This is your structure—don't skip it or swap it for cake flour, or you'll end up with cookies that spread too thin and lose that tender bite.
- Creamy peanut butter (1 cup): This is the star, so use the good stuff you actually like eating straight from the jar; the quality difference is real and noticeable.
- Unsalted butter (1/2 cup): Softened butter creams better with sugar, creating that light, fluffy base that makes the final texture possible.
- Granulated sugar (3/4 cup): This gives you structure and helps the cookies hold their shape while baking.
- Light brown sugar (1/2 cup, packed): This adds moisture and depth—it's why these cookies stay chewy instead of dry the next day.
- Egg (1 large): Your binder and the reason the cookies hold together without being dense.
- Vanilla extract (1 teaspoon): Just a whisper of it, but it rounds out the peanut flavor in a way that makes people ask what the secret ingredient is.
- Baking soda and baking powder (1/2 teaspoon and 1/4 teaspoon): These lift the dough just enough so the cookies stay soft inside.
- Fine salt (1/4 teaspoon): Salt isn't optional—it wakes up the peanut flavor and balances the sweetness.
Tired of Takeout? 🥡
Get 10 meals you can make faster than delivery arrives. Seriously.
One email. No spam. Unsubscribe anytime.
Instructions
- Set your stage:
- Preheat the oven to 350°F and line your baking sheets with parchment paper while you're thinking about it. Cold sheets in a hot oven never give you the results you want.
- Combine your dry blend:
- Whisk the flour, baking soda, baking powder, and salt in a medium bowl—this mixing step makes sure the leavening is even throughout, so you don't get weird dense pockets.
- Cream the butter and sugars:
- Beat the softened butter, peanut butter, and both sugars together for about 2 minutes until it looks pale and fluffy. This aerates the mixture and sets you up for cookies that'll have a tender crumb instead of feeling dense.
- Add your wet ingredients:
- Drop in the egg and vanilla, mixing just until combined. You'll feel the mixture transform from crumbly to silky in about 30 seconds.
- Bring it all together:
- Add the dry ingredients to the wet ingredients gradually, stirring just until no flour streaks remain. Overmixing develops gluten, which turns cookies tough—stop the moment you see everything incorporated.
- Shape and score:
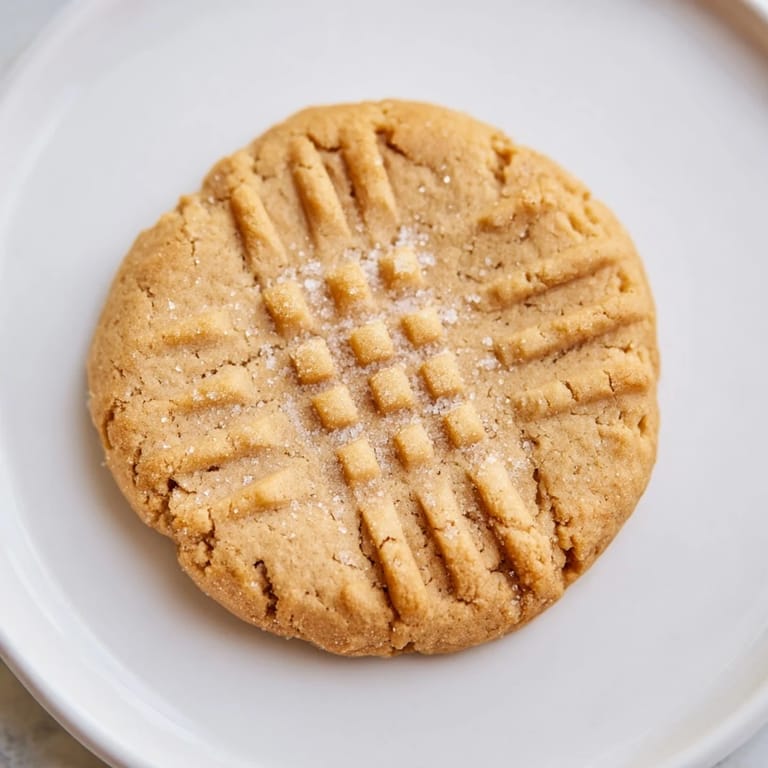
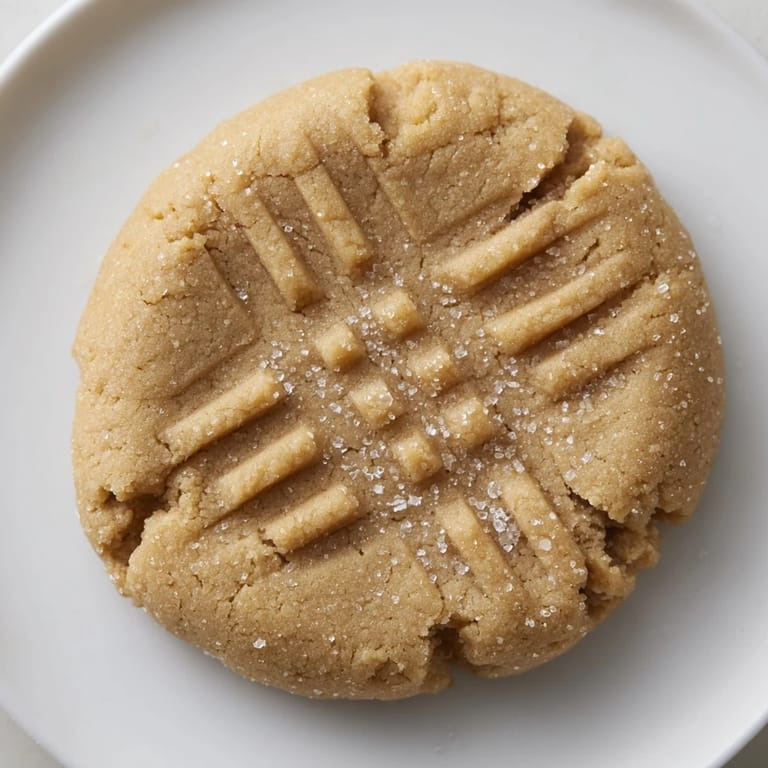
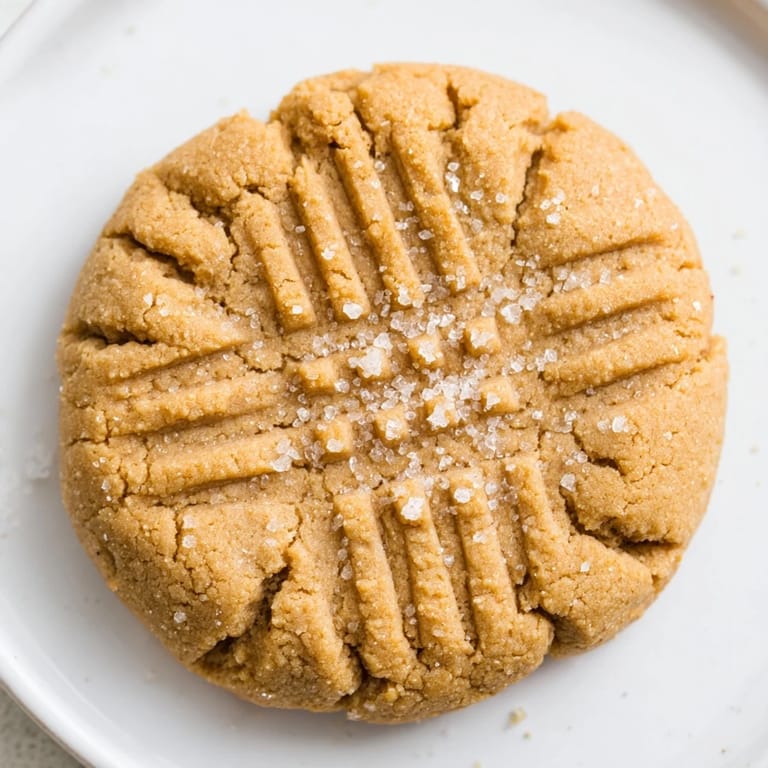
- Scoop about 1 tablespoon of dough per cookie, roll each into a ball, and if you want, roll in granulated sugar for a little sparkle. Place them 2 inches apart on your prepared sheets, then take a fork and press down in a crisscross pattern—this flattens them evenly and creates those signature ridges that catch the heat just right.
- Bake with intention:
- Bake for 10 to 12 minutes until the edges are lightly golden but the centers still look slightly underbaked. This is the moment that matters most—they'll firm up as they cool, staying chewy in the middle instead of turning into hard biscuits.
- Cool with patience:
- Let them sit on the baking sheet for 5 minutes (they're still setting), then transfer to a wire rack to cool completely. I know it's hard to wait, but those first 5 minutes are non-negotiable.
 Pin It
 I gave a batch of these to my friend Marcus when he was going through a rough time, and he told me weeks later that eating one while sitting on his porch with a cup of coffee became his little reset button during stressful mornings. That's when food stops being about flavor and becomes about care.
The Crosshatch That Matters
That fork pattern isn't decoration—it's actually changing how the cookies bake. When you press the dough flat with a fork, you're creating ridges that brown slightly faster than the flat areas, giving you these little caramelized edges that have a completely different texture from the center. The first time I understood this, I stopped making cookies that all looked and tasted the same. Now I press down deliberately, making sure I get two clean passes that cross each other.
Making Them Your Own
These cookies are a blank canvas if you want them to be. I've made them with chunky peanut butter and gotten a cookie with actual texture you can feel, which some people prefer over the smooth version. Chocolate chips work beautifully—add about half a cup and fold them in gently at the end. I've also chopped up roasted peanuts and stirred those in, creating this cookie that feels homemade and adventurous without being complicated.
Storage and Second Life
These cookies stay soft for about 4 days if you keep them in an airtight container with a piece of bread tucked inside (the bread gives up its moisture so the cookies don't dry out). After that, they're still good—just not quite as tender. I've also frozen the dough balls in batches, which means I can bake just 4 or 5 fresh cookies on a random Tuesday afternoon without making a whole batch.
- An airtight container with a slice of bread keeps them soft and ready to eat for days.
- Frozen dough balls bake straight from the freezer with just 2 extra minutes added to the baking time.
- If they do get hard, a 10-second pass under the microwave's steam setting brings back a hint of that chewy texture.
 Pin It
 These cookies have shown up at potlucks, been mailed in care packages, and quietly sat on my kitchen counter as a reason to make myself pause and have something good with my coffee. That's their real purpose.
Recipe FAQs
- → What causes the classic crosshatch on these treats?
Using a fork to press twice horizontally and vertically before baking creates the signature crisscross pattern while slightly flattening each dough ball.
- → How can I achieve a chewier texture?
Bake the treats for around 10-12 minutes until edges are lightly golden but centers remain soft. Longer baking will yield a crunchier bite.
- → Can I use chunky peanut butter for different texture?
Yes, chunky peanut butter adds extra crunch and nuttiness, offering a nice variation on the classic smooth texture.
- → Is it necessary to roll dough balls in sugar before baking?
Rolling dough balls in granulated sugar is optional but adds a subtle sugary crunch and enhances the outer texture.
- → What is the best way to store these treats?
Store cooled treats in an airtight container at room temperature for up to one week to maintain softness and freshness.